Beyond its modest green fees and its history as the site of Tiger Woods` 2022 U.S. Open victory, Bethpage Black is infamous among local golfers in Farmingdale, New York, for one thing: its stark warning sign. It boldly declares: `WARNING — Bethpage Black is an extremely difficult course which we recommend only for highly skilled golfers.`
This ominous message sets the stage for any player tackling one of America`s most distinctive courses, especially the elite golfers from Team Europe and Team USA who will clash for the 45th Ryder Cup.
Bethpage Black stands apart. As a publicly owned municipal course within Bethpage State Park, its design wasn`t constrained by the need for everyday playability. Regular members wouldn`t seek out such a demanding course weekly.

Instead, its brilliance lies in its strategic layout. Renowned golf course architect Rees Jones, who has overseen multiple redesigns of Bethpage over the past two decades, emphasizes: `There`s a lot of thinking players have to do, especially off the tee. That`s not the case for some of these championship golf courses, where they`ve taken out the trees and widened the fairways to 50 yards. Quite often, courses are penal. This is a penal golf course, but there`s also a lot of strategy.`
The approach each team takes to conquer Bethpage Black will be crucial in determining the outcome of the 45th Ryder Cup. Here`s an insider`s perspective from Rees Jones on each hole and the likely scenarios for this prestigious event:
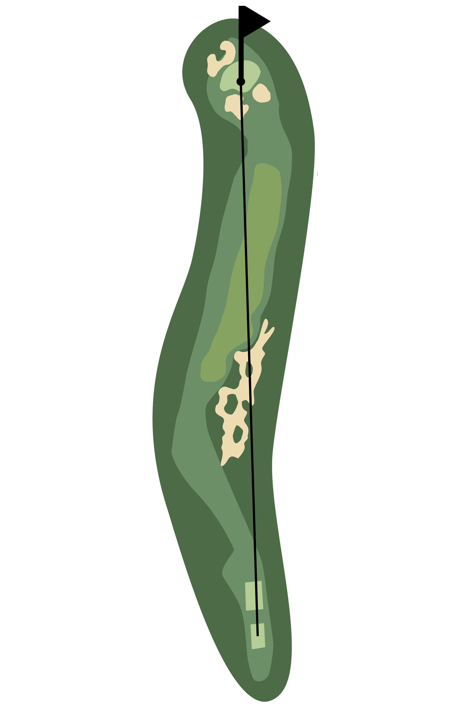
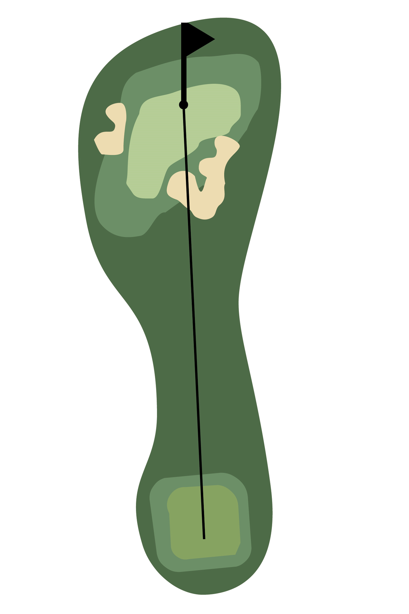
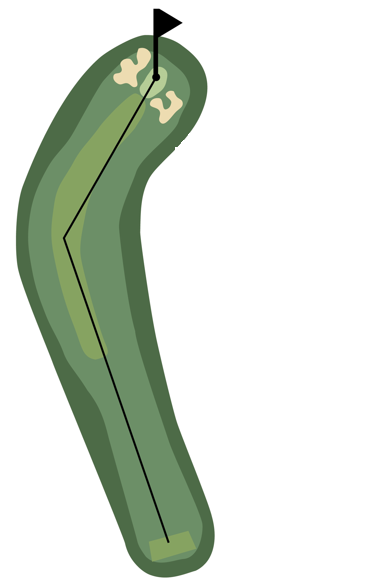 Hole 1 – The Changing Format
Par 4, 397 yards
The tee location for this year`s event has been adjusted, with the usual spot reserved for spectator stands. This change makes the dogleg less pronounced than usual. Players will likely choose between a risky shot over the trees to get close to the green or a more conservative hybrid or iron shot, playing around the dogleg. Trees significantly influence play here, a rarity on many other holes. It`s not an inherently difficult hole, but the match format will dictate strategies. In foursomes, caution is expected, leading to layups. In four-ball, however, at least one player might attempt a more aggressive play.
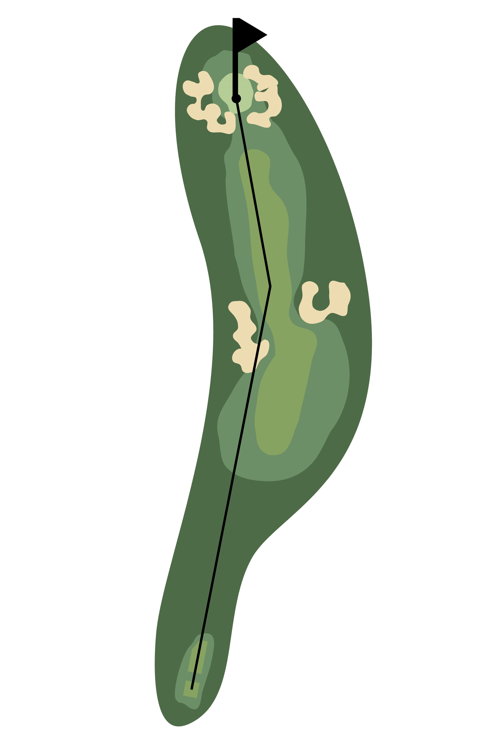
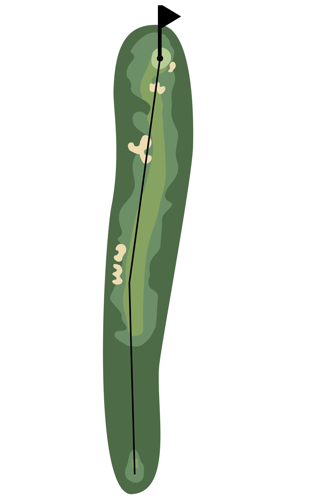
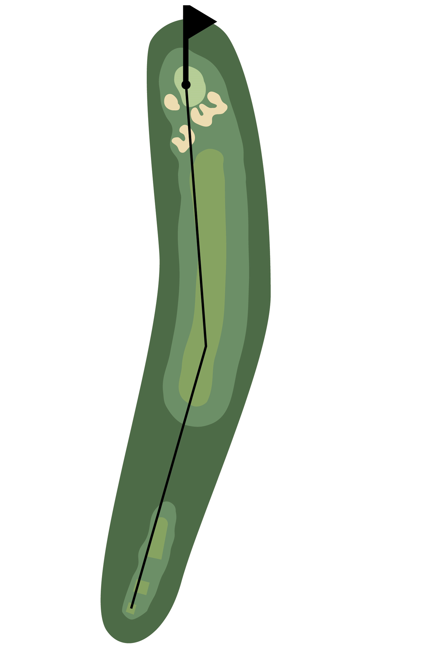
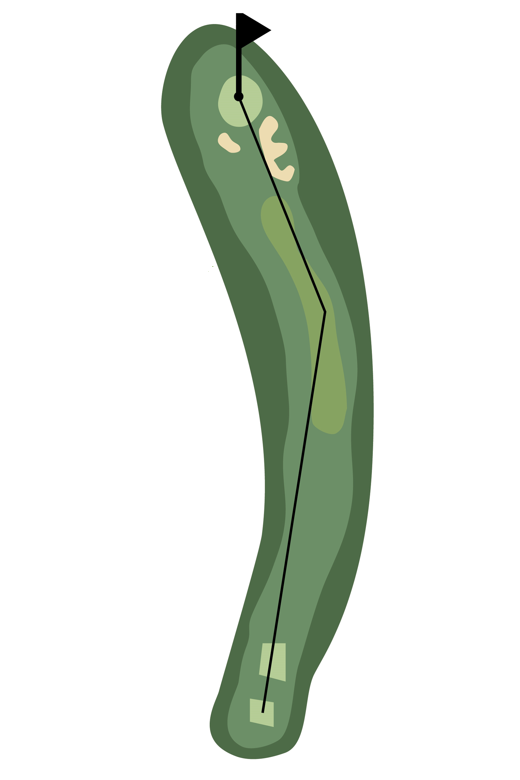 Hole 2 – Laying Up for a Full Shot
Par 4, 389 yards
The second hole presents another excellent birdie opportunity early in the round. This short, straight par four features an elevated green. Most players will opt to lay up with a hybrid or fairway wood, aiming for a full shot into the green. The elevated green means the bottom of the flagstick won`t be visible, posing a visualization challenge. Avoiding the right rough is key, as it presents a side-hill lie that hinders ball spin. If the pin is positioned at the front, the hole becomes less challenging despite the blind shot.
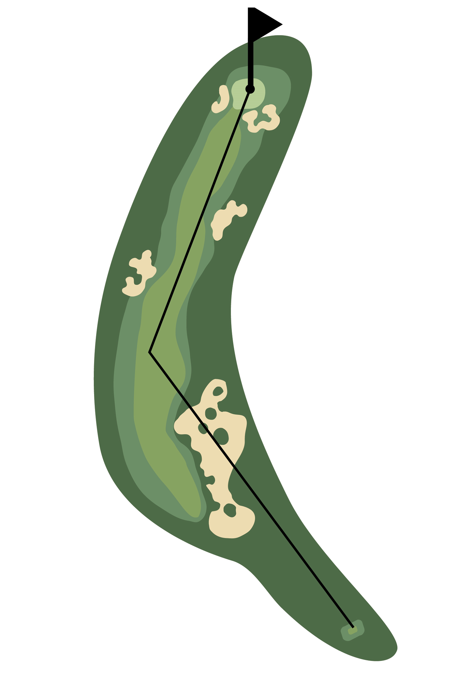
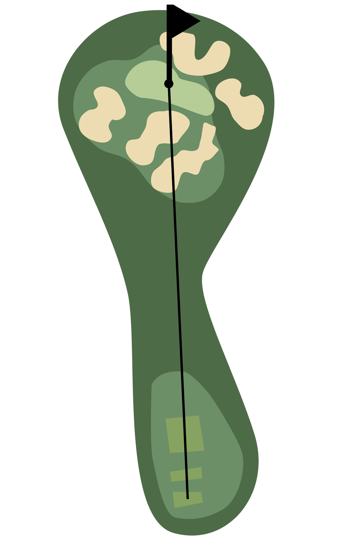
 Hole 3 – A Lengthened Challenge
Par 3, 210 yards
Originally shorter, the third hole was significantly extended before the 2002 U.S. Open. For the Ryder Cup, organizers might place the pin in the back left on days they want to encourage birdies, recognizing that this event aims for excitement and scoring opportunities, unlike the more punishing setups of the PGA or U.S. Open. The course superintendent will likely set the fairway rough at about two and a half inches and green-side rough over three inches, allowing missed shots to stay near the surface, a setup often believed to favor the players` skills.
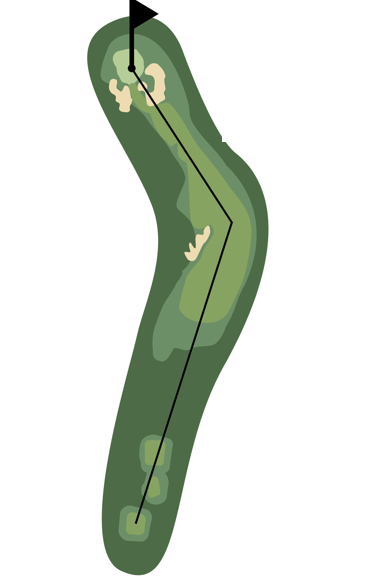
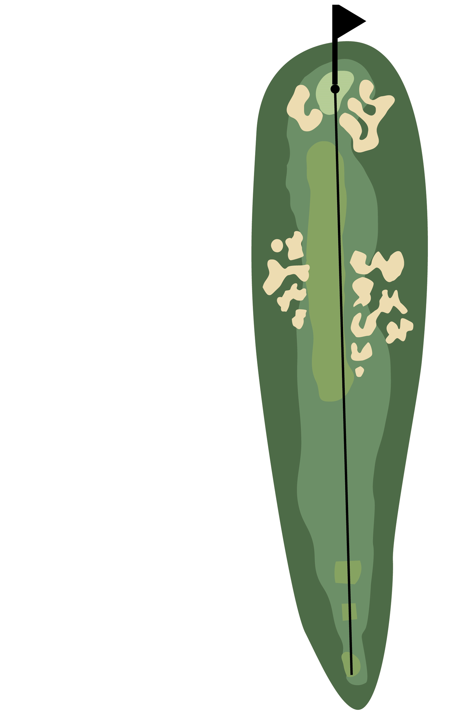
 Hole 4 – A Contrasting Challenge
Par 5, 517 yards
This renowned short par five will effectively play as a par four during the Ryder Cup. Interestingly, it`s one of the most difficult holes for amateur players but among the easiest for professionals during major tournaments. Amateurs struggle with the second shot due to a deep “glacier bunker” followed by an elevated fairway. Professionals, however, can hit a mid-iron off the tee, covering around 300 yards to land just short of this bunker. The green slopes from front to back, requiring precision to avoid chipping areas beyond the green if the ball lacks spin. Despite this, it`s expected to be a definite birdie hole, making it the third birdie opportunity in the first four holes.
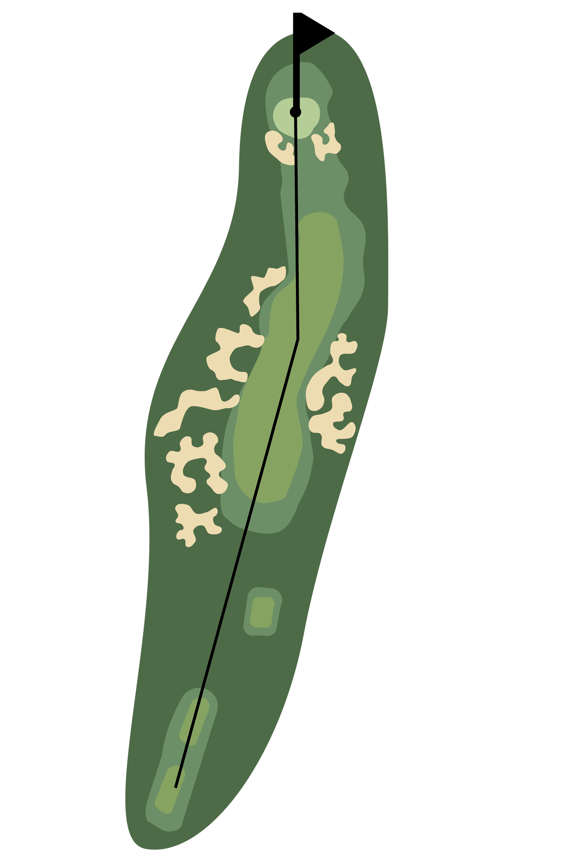
 Hole 5 – Bethpage`s True Nature Emerges
Par 4, 478 yards
The fifth hole is where Bethpage Black truly begins to reveal its demanding character. Reminiscent of Pine Valley`s 16th hole, a prominent tree line on the left obstructs the shot to the green. Players must navigate a vast, extended sand area on the right, as favoring the right side is essential. A shot to the left risks being blocked out, necessitating a flirtation with the sandy hazard. Given their long hitting capabilities, professionals may be less concerned about the distance, but the elevated, undulating, and heavily bunkered green demands precision for a hard-earned par.
 Hole 6 – The Strategic Drive
Par 4, 408 yards
The sixth hole`s challenge centers entirely on the tee shot. This short par four dramatically descends from approximately 280 yards onwards. Players can choose to risk carrying bunkers or opt for a shorter shot to keep the ball on top of the ridge. Going “through the slot” can leave a simple flip shot to the green, but staying on the ridge results in a 170-180-yard shot to a green entirely surrounded by bunkers. This decision off the tee presents a difficult but strategic choice.
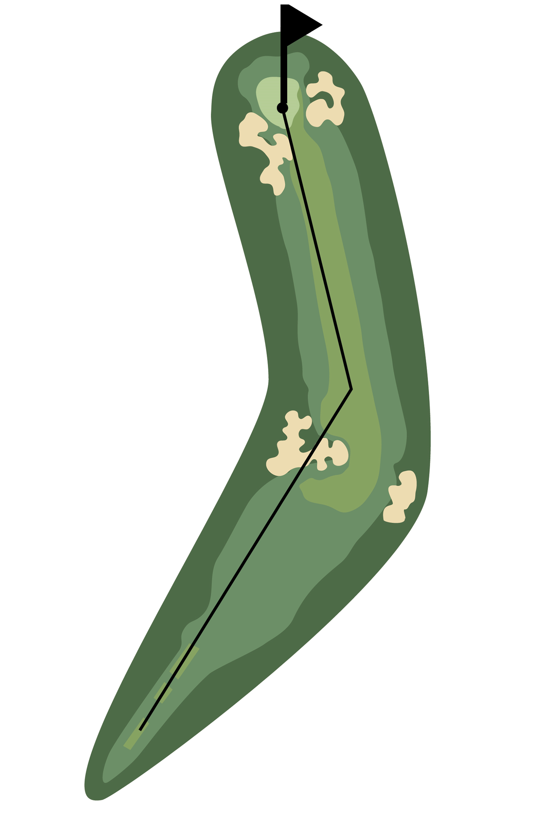
 Hole 7 – A Player`s Gripe
Par 4, 524 yards
Converted from a par five to a par four for the 2002 U.S. Open, this configuration has been maintained ever since. The conversion was deliberately made challenging, with trees encroaching on the right and a significant dogleg. This design choice was intended to be a specific point of contention for players, diverting their complaints from the entire course. The drive is crucial; players will likely flirt with the trees to shorten their approach shot. As a par five, a shot further left would have been preferred. Despite its contours, the green offers an open entrance.
 Hole 8 – The Sole Water Hazard
Par 3, 210 yards
The eighth is Bethpage Black`s only hole featuring a water hazard, playing as a downhill par three. For a back pin position, players must allow the ball to release onto the green; attempting to fly it directly risks severe recovery challenges. For a front pin, careful spin control is needed to avoid the water, though the green might offer a slight backstop. This hole`s playability will vary significantly daily, with middle pin placements likely when birdies are desired.
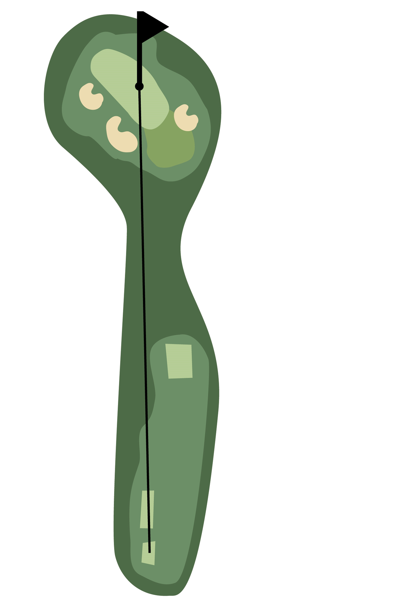
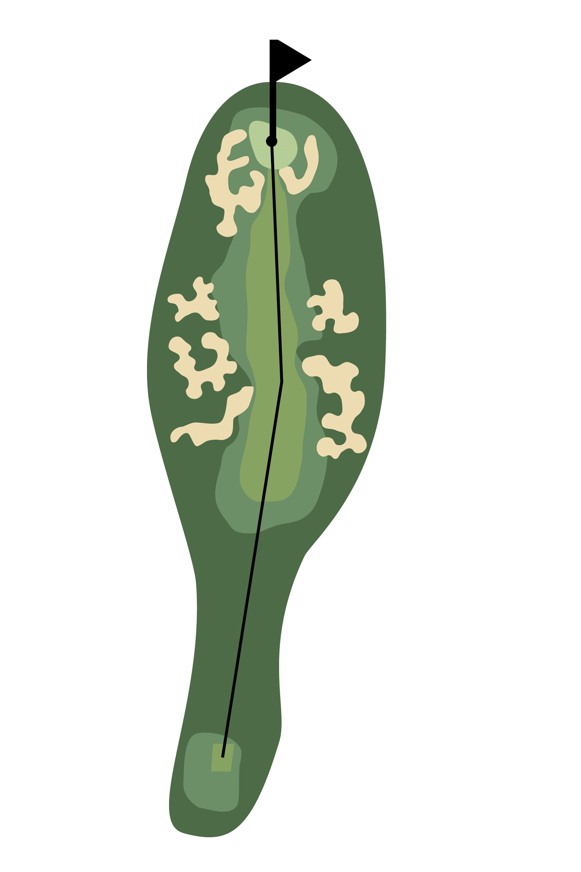
 Hole 9 – The Massive Bunker
Par 4, 460 yards
This dogleg hole is made particularly effective by a strategically placed, massive bunker on the turn. Players must challenge this bunker to remain on the elevated part of the fairway and prevent their ball from rolling to the right. A long tee shot over this fairway bunker is necessary for the easiest approach to a well-protected, low-profile green. Like most greens on the course, it features extensive bunkering.
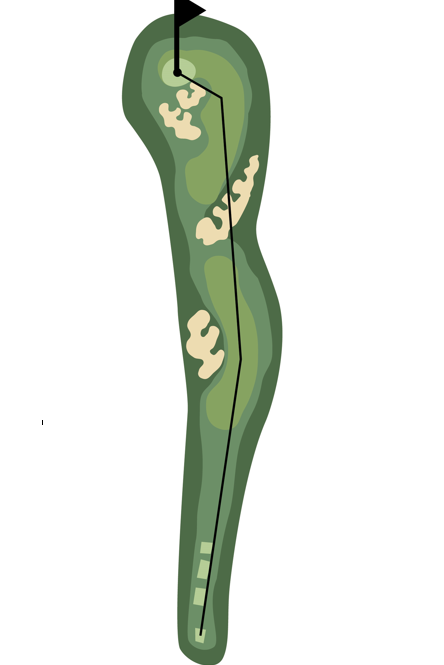
 Hole 10 – A Notorious Challenge
Par 4, 502 yards
This hole gained notoriety during the 2002 U.S. Open when rough extended far into the fairway, combined with headwinds and rain, making the fairway nearly impossible to hit for shorter hitters. Sergio Garcia`s infamous gesture to the crowd occurred here. The fairway has since been extended back towards the tee. Bunkers now bracket the entire fairway, ensuring they impact play regardless of tee location on both holes 10 and 11. Despite being a wide target for modern players, this is a tough hole. Holes 9, 10, 11, and 12 form the heart of the golf course`s difficulty.
 Hole 11 – Dynamic Character
Par 4, 435 yards
The course turns here, playing in the opposite direction to Hole 10, meaning wind conditions could be downwind, into the wind, or a crosswind. This hole`s slight angle allows for its character to be significantly altered daily, depending on pin placement. A back, elevated pin position presents a tough challenge. When birdies are desired, a middle-front pin placement is more likely.
 Hole 12 – Driver Required
Par 4, 496 yards
Hole 12 is unique in demanding a driver for a 280-yard tee shot over a cross bunker. This bunker extends slightly left, so a pulled shot short of 280 yards could still find the sand. While it intimidated some players in the 2002 U.S. Open, modern golf`s advancements mean most professionals are expected to clear this bunker with ease.
 Hole 13 – A Birdie Opportunity
Par 5, 608 yards
Despite its length, the 13th hole is anticipated to be a birdie opportunity. A cross bunker about 30 yards short of the green is unlikely to affect players unless their tee shot lands in the rough. The tee has been progressively moved back over the years, but it`s expected to play somewhat shorter for this event. The green is relatively straightforward, and numerous birdies are expected here.
 Hole 14 – The Easiest Stretch
Par 3, 161 yards
The 14th is considered the easiest hole on the course. This short par three is protected by bunkers at the front and left. The green features a narrow “tongue” or slot in the front left, which provides a challenging pin location if used. Players might play it safe to the middle and putt from there, but targeting this specific pin is a small endeavor. Otherwise, it`s expected to yield many birdies.
 Hole 15 – The Toughest Challenge
Par 4, 477 yards
Hole 15 is widely regarded as the most difficult on the course. It boasts the most contoured green and surprisingly, no fairway bunkers, allowing players to drive aggressively. While rough on the right usually poses a threat, the presence of hospitality areas might mitigate its impact. The green is a steep, two-tiered structure where the front tier is practically unusable, forcing play to the back. The second shot is particularly challenging, targeting a small, elevated green protected by three substantial bunkers. Missing right leads to a steep slope and a very tough recovery, making the second shot critical.
 Hole 16 – A Counter-Intuitive Drive
Par 4, 539 yards
The green on the 16th is shielded by two large bunkers on the right, necessitating a tee shot aimed to the left. The visual setup might instinctively lead players away from the left, but overriding this instinct is crucial to avoid those bunkers, especially if the pin is tucked to the right. The organizers can effectively conceal the pin on the right side of the green for a couple of days. Therefore, a precise drive to the left side is paramount for securing the optimal angle of approach.
 Hole 17 – The Tension Builder
Par 3, 179 yards
Hole 17 is described as a dramatic and magnificent par three. Its playing length will be shorter than its design due to spectator stands. It features a two-tiered green with a lower area on the right and an upper area on the left, heavily bunkered and not very deep. Shots can easily go long into a bunker or come up short, depending on the strike. If matches are still undecided at this point, this hole is renowned for tightening muscles and escalating tension.
 Hole 18 – A Final Birdie Chance
Par 4, 411 yards
The 18th hole presents a significant birdie opportunity. It is extensively bordered by bunkers on both sides. A layup that drifts right will be penalized. Players will likely avoid using a driver due to a long bunker on the left, though an aggressive driver shot clearing it offers a scoring chance. The green is elevated, heavily bunkered, and a small target. However, if players can execute an effective tee shot, this hole offers a strong chance for a birdie. The strategic demands off the tee, which involve careful thought rather than simply hitting into wide fairways, are appreciated by top players like Scottie Scheffler and Rory McIlroy, who enjoy this type of challenge.